Food
Homemade Pumpkin Puree

One of the more unexpected effects of Hurricane Irene last August was a shortage of canned pumpkin puree on the local supermarket shelves. Flooding had evidently destroyed a significant portion of the commercial pumpkin crop on the East Coast, and as a result, my husband, Keith, has been deprived of pumpkin pie, pumpkin butter, pumpkin cinnamon rolls, pumpkin soup, and anything else pumpkiny for well over a year. He’s pretty sad about it.
You see — failing to recognize the hard times that had fallen upon the canned pumpkin industry — we had blown off making our own pumpkin puree. I was newly pregnant and wanted to do nothing but sleep and avoid vegetables at all costs (or vegetable-like fruits, if you want to be picky); so wrangling a giant squash seemed out of the question. Of course, it was a decision we would live to regret when Keith decided to go shopping for pumpkin pie ingredients shortly before Thanksgiving, only to return home defeated and pumpkinless.
Never again. From now on, we know that there’s no excuse to not make our own pumpkin puree. It only takes a few hours — with breaks — and one 15-pound pumpkin will yield about 20 cups of fresh puree. That’s as much pumpkin as we’ll ever need for all of our fall and winter needs, done in the space of an afternoon.
INGREDIENTS
- A pumpkin (or any winter squash)
EQUIPMENT
- Sharp knife
- Metal spoon
- Oven
- Food processor
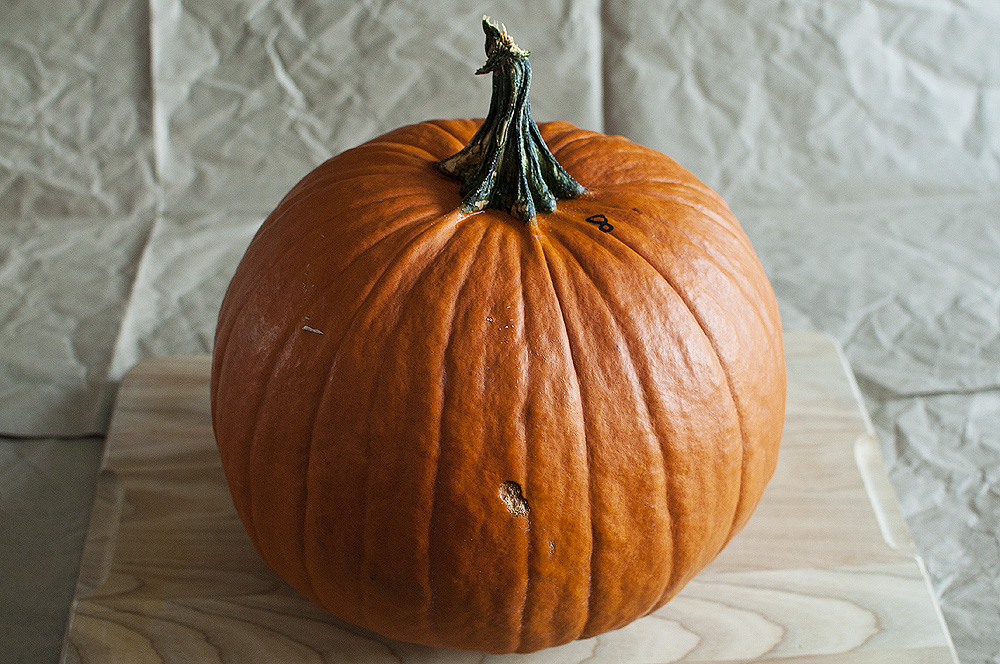
When selecting a pumpkin, look for one that is free of visible mold or soft spots, and one that has a healthy green stem that’s not too dry or loose. Give the pumpkin a gentle knock in a few different places with your knuckle; you should hear a solid “thunk.” In hopes of getting one that’s a little fleshier, I try to select one that seems heavy for its size. The best way to do this — as far as I know — is to zero in on pumpkins of a particular size and pick each one up. This may or may not involve running back and forth at the local farm stand with a wagon, picking up the same three pumpkins for ten minutes.
We used a rather large pumpkin; yours can be smaller (or bigger!). The procedure is the same no matter what size pumpkin you use, but the cooking time will vary. Always keep an eye on it while cooking, and never leave a hot oven unattended.
Preheat oven to 350 degrees.
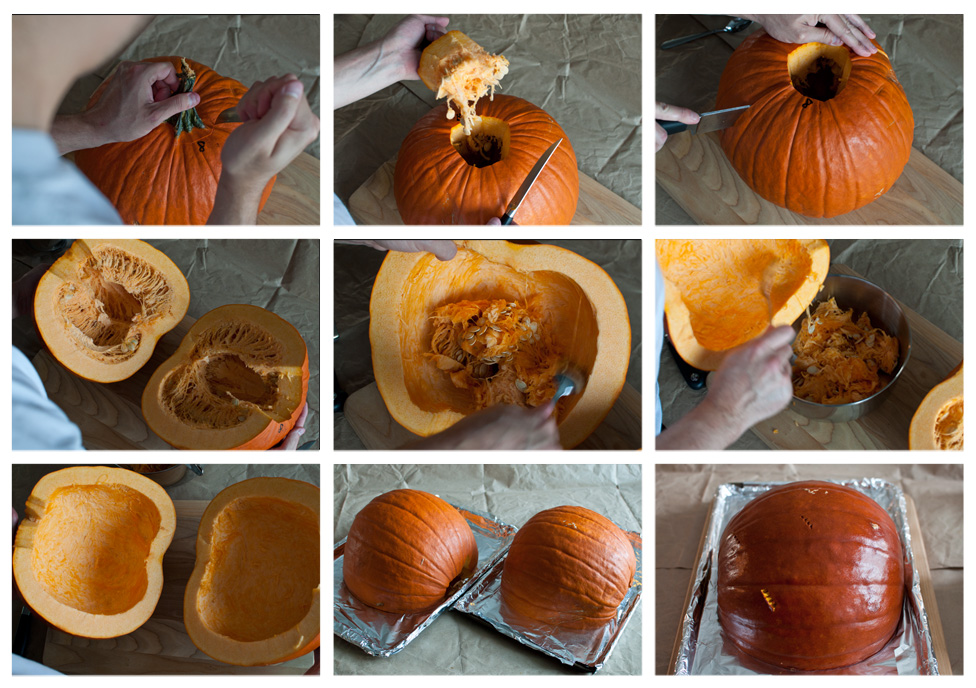
1. Wash the pumpkin with a little mild dish soap, warm water, and a vegetable brush. This will help avoid cross-contaminating the flesh with any dirt or bacteria that may be lingering on the surface when you cut into the pumpkin.
2. Remove the stem by cutting around it with a sharp knife, like you would to carve a jack o’lantern. To be extra safe, use a very sharp knife and cut with the blade facing away from yourself. Rotate the pumpkin as you work so that the knife is always at a safe angle.
3. Cut the pumpkin in half (top to bottom).
4. Use a metal spoon to scrape out the seeds and pulp (the stringy stuff). Scrape hard, removing as much of the pulp as possible.
5. Place each pumpkin half on a foil-lined cookie sheet, cut side down, and roast in the oven until you can easily pierce the pumpkin (skin and all) with a fork.
We could only fit one half of our 15-pound pumpkin in the oven at a time. Each half took about one hour to cook. Allow the pumpkin to cool to the touch (ours took about 45 minutes).
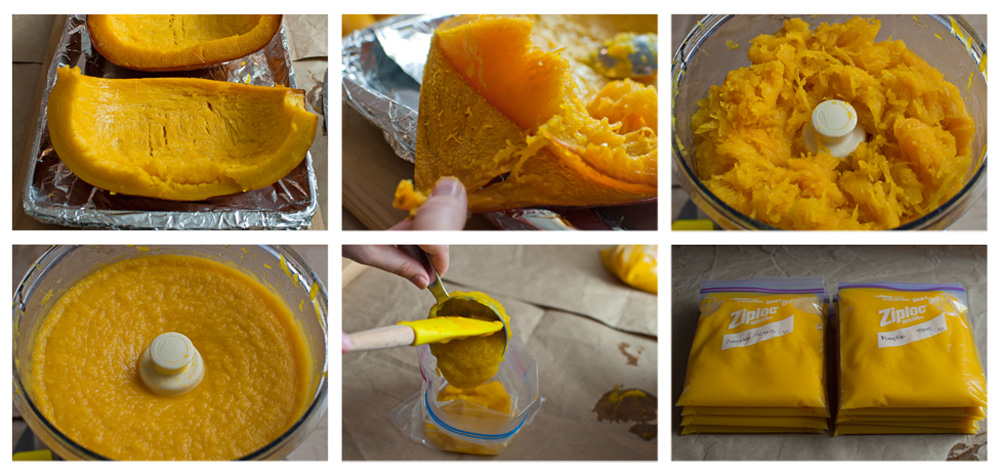
6. For easier and safer handling, cut each cooked half in half (top to bottom). Then flip so that they are flesh side up.
7. Use a spoon to scrape the flesh from the skin. Alternatively, you can try to peel the skin from the flesh (in which case, don’t flip it over). Put the flesh in the bowl of a food processor, fitted with a chopping blade.
8. Puree the pumpkin in the food processor until the flesh is no longer stringy and the consistency is the same throughout. It will be about the same consistency as applesauce.
9. Store the pumpkin in an airtight container in the refrigerator for up to a week. Or, if you don’t plan to use 20 cups of pumpkin puree within a week, measure puree into freezer bags. One or two-cup portions work well for me. When the puree is cooled to room temperature, squeeze as much air as possible out of the bags and seal. Lay flat in the freezer to save space (storing them this way also reduces thawing time when you’re ready to use it).


Wow — awesome to see your process! This definitely makes me want to make some myself. Please post recipes using the homemade puree!